• Welcome to the Vanguard Community

    These forums date back to the game's origins as the Crysis mod Traction Wars. Over the years the game and internet habits have evolved and discord.gg/vanguardww2 is now the principle home of the community.

    The team continue to read and reply to posts here, but we can be contacted more quickly on Discord.

Battleaxe's practical guide to... modelling

Status
Not open for further replies.
My fellow Tractionists

Given your positive reactions to my Heinkel 219, I thought you gentlemen would like an in-depth look into the art of model making. Over the coming posts, I will explain both basic and more advanced techniques to make a model look good, old, dirty, used, factory fresh and whatnot. This first post will be a bit long, so you might want to grab a coffee.

But first, the beginning.

Which is a good brand for model kits?

It depends. If you're a seasoned veteran, you could go for Dragon. They make excellent kits with huge amounts of detail. But they aren't the cheapest kits, and the level of detail means a lot of small parts, easily devoured by a shaggy rug. But they are very good kits, even the old ones. They usually come with a number of photo-etched parts, which require some skill to handle.

On the other side of the spectrum, we have Airfix! Yes, I know it's a bit of a cliché, but the new Airfix is shaping up to be a serious contender on the market again. Reviews of current Airfix kits are very promising. They offer a lot of detail, while keeping it simple. So, if you're new to the trade, go off to your local model store and buy an Airfix Hurricane.

In between these extremes, there are a lot of other brands who offer various qualities for various prices. Tamiya, Italeri, Trumpeter, Hasegawa, Hobby Boss, Meng, Revell, and the list goes ever on.

Revell is a bit of a tricky one. They generally have very good kits of their own, and of Monogram (they merged with this American company quite some time ago). However, be aware of 1/72nd scale tank and airplane kits. In a number of cases, these kits have been bought from older companies, such as Matchbox or Frog. The quality of these kits is often questionable.

I've got me kit, now what?

The basic supplies for a modeller include glue, paint, brushes, a file, sand paper, tweezers, a cutting board, a modelling knife, and some toothpicks. Some of these items you'll have lying about the house, others you'll have to go and buy.

Glue is best bought in a bottle with a brush or in a needle dispenser. The brush bottle is good for general work, the needle is handy in tight spaces, or with small parts. Paint is a different thing. You'd better hold off buying the paint until after you've opened the kit and had a look at the instructions. That way, you'll have a better understanding of your needs. Of course, over time you build up a collection of paint so this step will become obsolete.

I've found that currently it is best to use acrylic paint you can thin with water. They are user-friendly and they won't smell as bad as enamel paint. I would also recommend to do a bit of photographic research first to see what colours were actually used, because the instructions can vary from reality. Generally, each model requires black, white and aluminium paint, so its a good idea to keep those in permanent supply.

Coming up next: a practical example.

I hope you like it.
 
Right, I've got all that, can I start now?

Yes, you can! Just read through the instructions carefully, and find a place you can cover with old newspaper, some plastic sheet,... so you won't spill paint all over your mother's favourite table cloth.

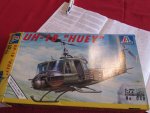
Now, to business! As a practica example, I'll be using an old Italeri UH-1B Heavy Hog. The quality of the kit is still good, despite its age. However, the panel lines are represented by raised detail. Ideally, you would remove those lines and engrave them back onto the parts, but I won't be doing that on this model. I've still got an Airfix Corsair III lying about, which has got terrible raised detail. (see attachment 1)

The Heavy Hog is a further development of the UH-1 helicopter. It was built to ensure the safety of Landing Zones for transport Huey's. To be clear, this was before the AH-1 Cobra was built. The downside of having those rocket pods was that you couldn't open the doors anymore.

Anyway, back to the model.

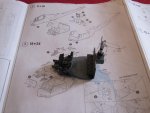
It was only after I had started work that I decided to make this, so here's a bit I've prepared earlier. (see attachment 2)

Cockpit assembly is a logical first step in the process of building an aircraft or helicopter model. This one is also fairly simple, as it doesn't have a decal instrument panel, but I prefer painting it on anyway. After assembly, I painted it according to the instructions, as they are pretty close to reality. After drying, I put a black wash into the panel lines and details, and finished off with a white dry-brushing.

Right, that's all for today. Feel free to ask if a question arises.
 

Attachments

  • IMG_5541.jpg
    IMG_5541.jpg
    94.9 KB · Views: 13
  • IMG_5540.jpg
    IMG_5540.jpg
    87.1 KB · Views: 13

mmiedzianyy

Member
I used to build plastic models. But then i switched to this made of cardboard. They don't require paints and other stuff which can use up and are also quite bigger ;D But no matter what you choose, they bring a lot of fun! :)
 

litchu

Member
I've done a spitfire myself, but I'm not that good at modelling.. ( the left wheel broke off )


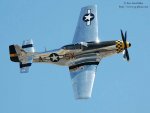
I'm still dreaming of doing a P-51 Mustang and then paint it chrome becaus whats more sexy than this?

http://i3.photobucket.com/albums/y62/Dogbytes/Mustang1_DSC_3448.jpg
 

Attachments

  • Mustang1_DSC_3448.jpg
    Mustang1_DSC_3448.jpg
    33.3 KB · Views: 5
[MENTION=938]litchu[/MENTION]: Tamiya offers great airplane models at 1/48th scale. They have a few kits of P-51's, and they're easy to assemble, no filler required. Also, I've looked into my archives and found several bare-metal planes. They used Tamiya paint in a spray can, which can give very good results. To get the bare-metal-and-waxed look you want, you'll need a can of TS-30 silver and TS-13 clear. The gloss clear will give you the "simonisé"-look (as we say here) you want.
 
A wild Wingnut Wings Walfisch appears!

Having read a number of articles on various Wingnut Wings kits, I decided I should have a go myself. Of course the first thing to do was to decide which one to take. Because I have no previous experience with rigging, no RFC plane was really an option due to the doubly rigged wing spars. Which was a pity, because there are some great subjects there as well.

Anyway, a Hun it would be (please note that "the agony of choice" is a very apt expression for this brand). As luck would have it, my exam results were good, so that accelerated the process quite a bit. The decision was made to buy a Roland C.II, partly because an article on that very kit had just been published in WingMasters Magazine, and would offer a good guide to avoid any possible traps.

The kit itself costs $99.00 USD, and I ordered some elastic rigging wire with it. As stated on the website, fifteen days after the order was placed, it arrived. Along with a €35 import tax note...:( Shipping all the way from Wellington, New Zealand was free, though. Do subjects of the British Empire have to pay import tax for something that came from the colonies, actually?

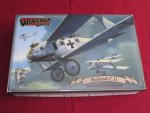
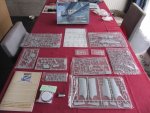
The box itself is about standard size, but it's filled to the brim.

IMG_5544.jpg

The parts are very well moulded, little to no flash or burrs are present. 5 decorations are possible, but for one, there are 5 options. That plane happens to be the best known Roland, and is represented on the box. A machine of Feldfliegerabteilung 2 Bavaria, piloted by Eduard Ritter von Schleich and Vogeley, and by Johann Czermak and Hafner. That happens to be the one I'm going to build.
 
Poweeerrr!! And some wood

Hello, everyone. I know it's been a while, but two translations and two revisions per week can play hell with your spare time. Anyway, today I'll be showing you the work that has been done on the engine and cockpit.

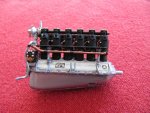
First off, the engine. Now, the Roland was powered by a straight six-cylinder Daimler-Mercedes D.III, which could produce 160 horsepower. This gave the Whale a top speed of around 165 km/h (102 mph), allowing the machine to outrun most, if not all fighter planes the Entente forces could field in late 1915.

IMG_5876.jpg

The engine went together really smooth. I did however encounter a small issue with the prop shaft, which doesn't seem to be perfectly round. So it doesn't spin very smoothly, but that's no real problem. As you can see, everything down to the spark plug cables have been represented. The cables are actually not included in the kit, but they have provided mounting holes in both the cylinders and the cable tubes. So, armed with a few strands of copper wire, some loctite and a boatload of patience, I made them myself. The decals are made by Cartograf, so they are impeccable. They were placed with some care, because I finally got my setting solution, and it was the first time I tried it.

One word of warning! The air pump (the part right behind the rocker arm on top of the engine) should be glued in place after the engine is mounted in its cradle. Otherwise you'll have to jiggle with the parts to make it fit.

Next up is the rest of the interior.

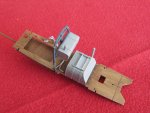
IMG_5877.jpg

The instructions mention that the floor can be either painted to look like wood, or in a dull blue-grey. Obviously, the wood was the more tempting option. The technique is deceptively simple: first you paint the floor beige. I did so with enamel paint because I had some lying around. Next, put a dollop of dark brown oil paint on your work surface. I used Winsor and Newton Burnt Umber. Take a piece of ordinary kitchen paper and make one end a flat ball. With that flat ball, wipe up some of that oil paint and spread it out to match the width of the part you want to treat. Apply a generous first coat of oil paint and keep sweeping over it until the desired effect is reached. You can vary the directions of sweeping to add some life to it. Leave to dry overnight.

That's all for today, I hope you like it!
 
Picking up the pace

Hello, chaps. It has been a considerable while, so here's what I've been up to lately.

IMG_6158.jpg

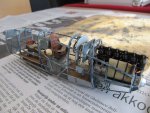
As you can see, the interior is now largely complete. Most of the things that still need to be done are mainly weathering-related. After that, the insides of the fuselage will be painted, but that will be in the next update, I think. The control cables are fiddly to put in place, but the elastic capabilities of EZ Line are a considerable help. The belts are kit-supplied photo-etched parts (thin brass parts), but they are somewhat difficult to form. You have to use the seat to be able to shape them according to the intended position they will be represented in.

IMG_6159.jpg

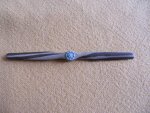
The propellors mounted on Roland C.II's were Axial made ones. Working from available pictures, it would seem that those had 5 layers of laminated wood. I am deliberatley being careful about this statement, because in the period photographs it is very difficult to see the boundaries between the layers, because they were covered with a very dark varnish. As with many other aspects of WWI airplane modelling, it comes down to best guesses from other modellers.

This piece will eventually get six-seven layers of paint, depending on the darkness of the varnish. Two base coats of beige, the dark brown layers of wood, a sweeping of dark brown oil paint, one or two layers of brown tinted varnish, and one layer of clear to seal in the producer marking decals.
To paint the darker pieces, you need a freshly sharpened pencil and a fine paint brush. Once the second coat of beige is completely dry (preferably overnight) mark the outer boundaries of the darker wood with the pencil following the photographic reference. Be careful not to press too hard. Try to make both sides of the central hub match (not easy, I must admit). Then, paint the outsides of the dark wood first and fill in afterwards. Finally, touch up where necessary (still have to do that).

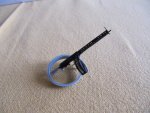
The last bit I want to show you is the rear mounted Parabellum LMG 14.

IMG_6162.jpg

This is the high-detail version with the cooling jacket made in photo-etch. They were very kind to supply the kit with a shape around which you can form the jacket. To ease the process, I had to resort to basic smithing techniques. I held the piece over a flame to heat it and left it to cool naturally. Then you form the piece and heat it again. This time, temper the piece in water. This will harden the part and make it less prone to deformation. It still remains quite fragile, so be careful.

That's all for this time, unfortunately. If a question arises, feel free to ask!
 
The Perils of Paint

Hello, chaps. Time for another update.

Today, I'd like to talk about the choice of paint for a certain job. In the first post, I mentioned using water-thinnable acrylic paint. Well, not all acrylic paints are the same. I thought Revell Aqua Colour was a good choice, however it turned out it's not. Basically, it's glorified gouache. It's a fatty substance, and most importantly, it doesn't agree very well with an airbrush. A fact pointed out by Exhibit A:

IMG_20151010_143008.jpg

These are the bottom wings of the Roland. The technique I'm using is called pre-shading. Using an airbrush, you highlight panel lines, contours, and things that in reality would shine through the surface, in this case the internal structure of the wings, before applying the base colour in very thin layers. The left one was done with enamel paint, the one on the right with Aqua Colour. Nevertheless, no damage done.

On a more positive note, 90% of the interior work is done now that the fuselage interior is painted.

IMG_20151010_143326.jpg

I apologise for the lesser-than-usual quality, pictures were taken with my phone.
 
A Subframe Subclause

Hello, chaps! Back with some more pictures for you.

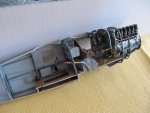
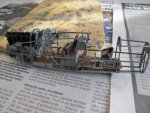
I have finished the interior, I believe. Yesterday, I've glued the interior frame together with the engine mount and the floorboard, and this is the result:

IMG_6163.jpgIMG_6164.jpg

And lastly, I've also given the propellor another coat of paint.

IMG_6165.jpg

Next step will be glueing the fuselage halves together. I don't really need to glue the interior in place, it will just hold its own when it's enclosed. Yet another testament to the precision of the CAD-work done.

Then, I believe some paint is in order...
 

litchu

Member
I found these in a store and just couldn't resist buying them:


Just need to find some time to build them :)
 
Careful with those large decals, they're easy to mess up. If you apply a drop of water on the surface, it should make them more manageable.
 

litchu

Member
Careful with those large decals, they're easy to mess up. If you apply a drop of water on the surface, it should make them more manageable.

I'm not quite sure on where to go with the decals, I'm afraid they'll give a plasticy look eventually. I was thinking about just using paint and not using the decals. What is your opinion on this?
 
Decals are a bit of a catch 22. On the one hand, they can be quite tricky, especially the large ones. On the other hand, they save you a lot of work with intricate motifs. Ideally, you use gloss paint or varnish as a base for decals. Then you put them on and cover them with a coat of flat varnish. That should take off the worst of the plasticky edge. Setting solution will make decals sit flush with the panel lines. Painting the markings on is something I haven't doen save once, but I wouldn't recommend it, really.
 
Status
Not open for further replies.
Top